
Independent guidance for making smarter, safer decisions across the Apple ecosystem.
Roughly 150 million used Apple devices change hands globally each year — yet a significant share of them arrive at their next owner with personal data, active Apple IDs, or enabled Activation Lock still intact. Skipping even one step in the handoff process can expose private information, strand the next owner with an unusable device, or void a trade-in offer entirely. This guide covers the complete lifecycle checklist for anyone preparing to sell, trade in, or give away an iPhone, iPad, or Mac in 2026.
Key Takeaways
- Back up and verify the backup before doing anything else — erasure is permanent.
- Sign out of your Apple Account on the device, not just remotely; this disables Activation Lock automatically.
- Remove eSIM profiles before erasure; they do not always delete themselves.
- Apple Pay cards must be removed from the device, not just from iCloud.com.
- Intel Macs and Apple silicon Macs use different erasure procedures — know which you have.
- Document the device’s condition and accessories before shipping or handing it over.
- Confirm the device disappears from your Apple Account’s device list after the transfer.
Step 1 — Back Up and Verify Before Anything Else
The single most consequential step happens before the device is touched for transfer: a verified backup. An iCloud backup or a local encrypted backup via Finder (macOS) or the Finder sidebar confirms that every photo, message, app setting, and health record is safe before erasure.
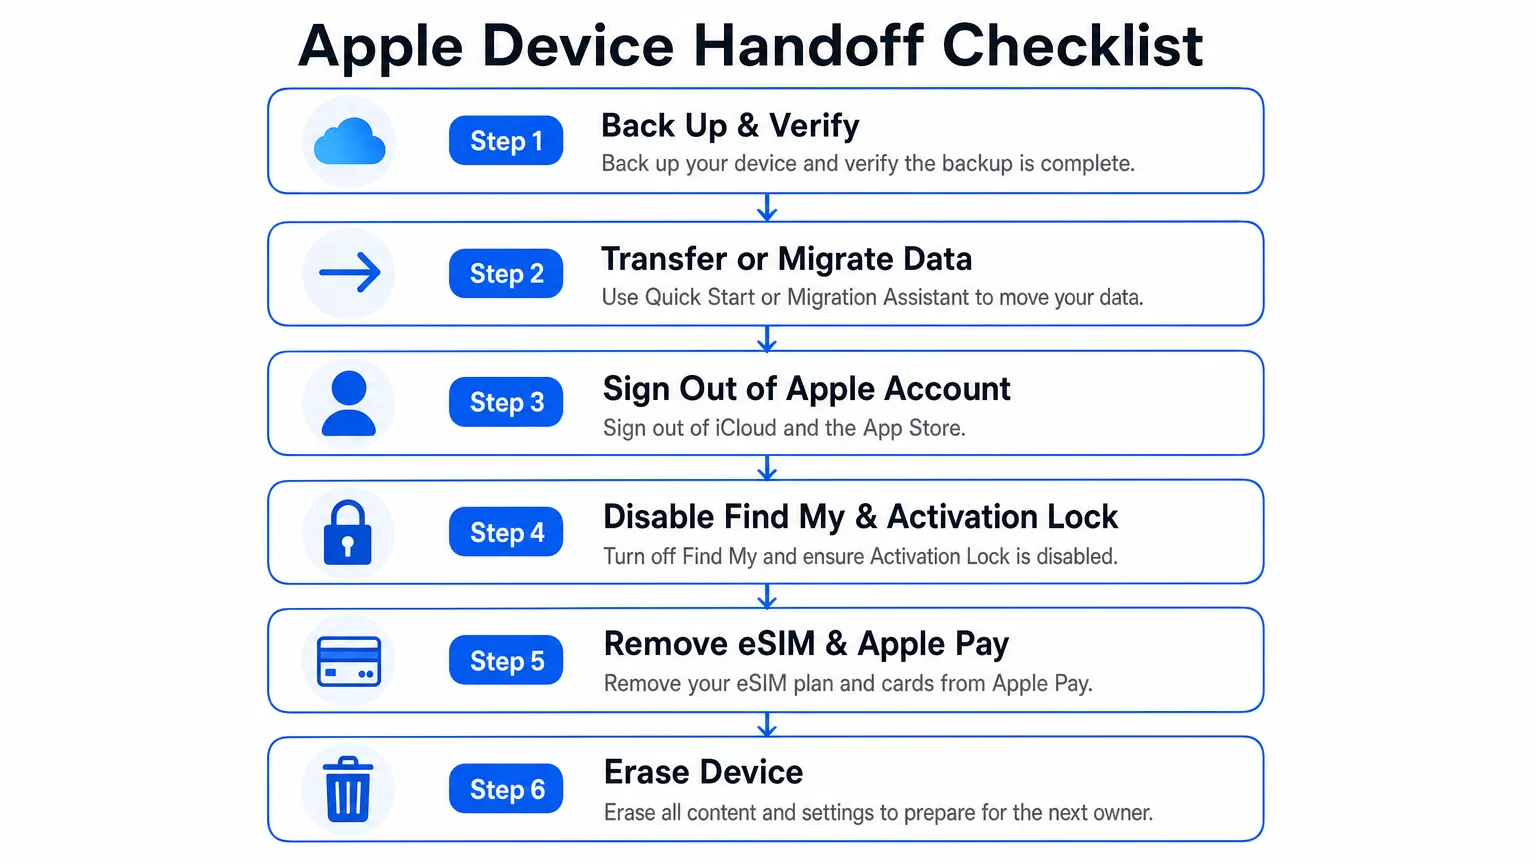
For iPhones and iPads, go to Settings → [Your Name] → iCloud → iCloud Backup → Back Up Now, then confirm the “Last Successful Backup” timestamp reflects today. For a Mac, Time Machine to an external drive or a full clone via a tool like Carbon Copy Cloner gives a restorable snapshot. Do not proceed until the backup is verified — not just initiated. A backup that fails silently is the most common source of data loss during device transitions. If storage is a concern, the guide on iCloud+ plans and storage tiers explains how to expand capacity quickly before a final backup.
Step 2 — Transfer Data to the New Device First
If the device being handed off is being replaced, complete the data migration to the new device before erasing the old one. iPhone and iPad support Quick Start, which uses a Bluetooth and Wi-Fi proximity transfer that moves apps, settings, and data directly. Macs support Migration Assistant, accessible during setup or from Applications → Utilities.
Confirm that the new device has received and can open the transferred data — check a few photos, verify Messages history, and open one or two key apps — before treating the old device as ready to wipe. This dual-verification step catches transfer failures that only become visible after the source device is gone. For those building a new Mac workflow from scratch rather than migrating, building a distraction-free writing workflow on Mac offers a clean-start perspective worth reading alongside Migration Assistant.
Step 3 — Sign Out of Your Apple Account and Disable Find My
Signing out of the Apple Account on the device — not just from iCloud.com — is the action that disables Find My and clears Activation Lock simultaneously. On iPhone or iPad: Settings → [Your Name] → Sign Out. On a Mac: System Settings → [Your Name] → Sign Out. The system will prompt for the Apple ID password and ask whether to keep a local copy of iCloud data; choose to remove it.
Activation Lock is tied to the Apple ID, not the hardware serial number. A device with Activation Lock still enabled cannot be activated by the next owner, regardless of how it was obtained. If the device was already erased before sign-out — a common mistake — Activation Lock can be cleared remotely at appleid.apple.com under Devices, but this requires the original Apple ID credentials. For a broader look at Apple Account security hygiene, the guide on setting up a privacy-first iPhone covers account hardening steps that complement this checklist.
Step 4 — Handle eSIM, Physical SIM, and Carrier Steps
eSIM management is the most frequently overlooked step in the checklist, particularly for iPhones purchased directly from a carrier. An eSIM is a software-based SIM profile stored on the device; it does not automatically erase when the device is wiped.
Before erasing an iPhone:
- Go to Settings → Cellular → [your plan] → Delete eSIM to remove the carrier profile.
- If transferring a number to a new iPhone, use carrier eSIM transfer before deleting the old profile.
- Physical SIM cards (nano-SIM) should be physically removed with an ejector tool before handing over the device.
- Contact the carrier to confirm the number has been ported or deactivated on the old device.
iPads with cellular connectivity follow the same eSIM removal steps. Macs do not carry SIM or eSIM hardware in standard configurations.
Step 5 — Remove Apple Pay, Wallet Cards, and Paired Devices
Apple Pay cards stored on a device are not automatically removed during a standard factory reset on older firmware versions. The safest approach is manual removal before erasure.
On iPhone or iPad: Settings → Wallet & Apple Pay → [card] → Remove Card. On a Mac: System Settings → Wallet & Apple Pay → [card] → remove. Cards can also be removed remotely from iCloud.com under Devices if the device is no longer accessible.
Paired accessories — Apple Watch, AirPods, Bluetooth keyboards, and mice — should be unpaired before the device is erased. On iPhone, unpair Apple Watch via the Watch app (this also creates a Watch backup). For AirPods: Settings → Bluetooth → [AirPods] → Forget This Device. Forgetting Bluetooth accessories prevents the next owner from encountering pairing conflicts or, in the case of Apple Watch, inheriting a device still linked to the previous owner’s health data.
Step 6 — Erase the Device Correctly for iPhone, iPad, and Mac
Erasure procedures differ meaningfully by device type, and using the wrong method can leave data recoverable or leave the device in an unactivatable state.
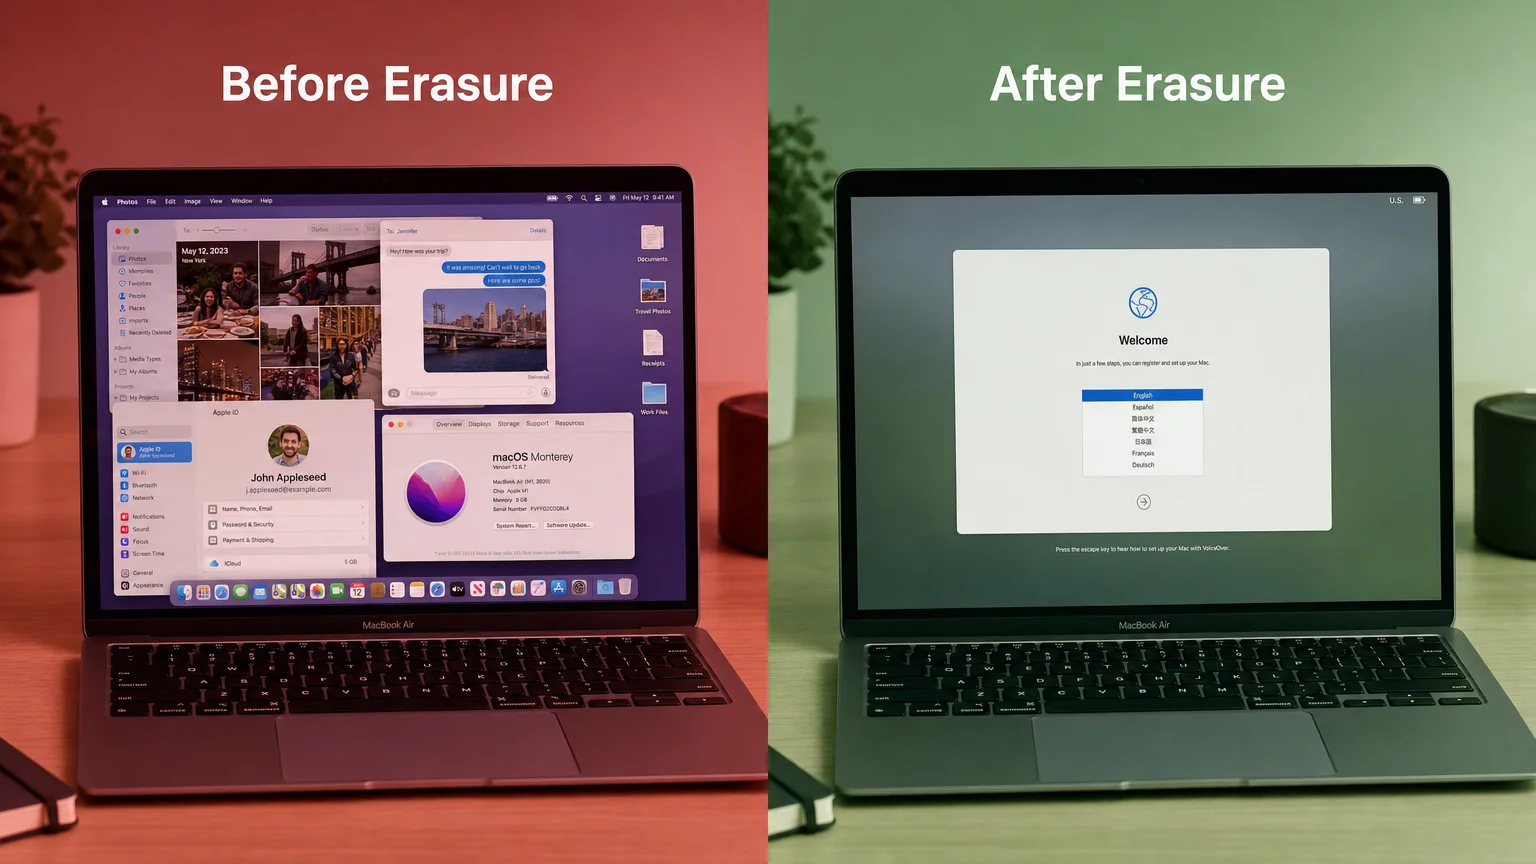
iPhone and iPad: Go to Settings → General → Transfer or Reset iPhone/iPad → Erase All Content and Settings. On iOS 15 and later, this process handles Activation Lock removal as part of the flow if the Apple ID is still signed in. The device will restart to the Setup Assistant screen — the correct end state.
Apple silicon Macs (M-series chips): Shut down, then hold the power button until “Loading startup options” appears. Select Options → Continue → enter administrator credentials → Erase Mac. This uses System Recovery and ensures the Secure Enclave is properly cleared.
Intel Macs: Restart into macOS Recovery by holding Command-R at startup. Use Disk Utility to erase the internal drive (choose APFS or Mac OS Extended as appropriate), then reinstall macOS from recovery. On Intel Macs with a T2 chip, also go to Utilities → Startup Security Utility and confirm that “Allow booting from external media” is set appropriately for the next owner.
A quick way to confirm which Mac architecture you have: Apple menu → About This Mac → Chip (Apple silicon) or Processor (Intel).
Step 7 — Inspect Accessories, Condition, and Packaging
Trade-in values and private-sale prices are directly affected by what accompanies the device and its physical condition. Before listing or shipping:
| Item | Check |
|---|---|
| Original box | Present, undamaged, correct model |
| Charging cable (USB-C or Lightning) | Functional, no fraying |
| Power adapter | Included if original |
| Screen condition | No cracks, deep scratches, or burn-in |
| Body condition | No dents, bent frame, or missing buttons |
| Battery health | iPhone: Settings → Battery → Battery Health |
| Camera lenses | Clean, no chips or haze |
Photograph every side of the device and accessories before shipping. These images serve as documentation if a trade-in provider disputes the condition grade or if a buyer raises a damage claim after delivery.
Step 8 — Trade-In Providers, Documentation, and Protective Packaging
Apple Trade In, Best Buy, Decluttr, Swappa, and carrier trade-in programs each have different value tiers, condition requirements, and payment timelines. Apple Trade In typically offers the most frictionless experience for credit toward a new device, while Swappa and eBay tend to yield higher cash values for well-maintained devices with original accessories.
For any mail-in trade-in or sale, use protective packaging: wrap the device in anti-static bubble wrap, place it in a snug box with foam padding on all sides, and avoid loose movement inside the package. Carriers like UPS and FedEx offer declared-value coverage for electronics — worth using for devices above a certain value threshold.
Keep a record of the device’s serial number (found in Settings → General → About or on the original box), the IMEI for cellular models, and any trade-in confirmation numbers. If the trade-in is later disputed or the device is reported lost in transit, these details are essential. For those deciding whether a replacement Mac justifies the investment, the MacBook Air vs. MacBook Pro workload comparison is a practical next read.
Step 9 — Verify Removal from Your Apple Account
After the device has been erased and handed over, confirm it no longer appears in your Apple Account. Sign in at appleid.apple.com, navigate to Devices, and verify the sold or gifted device is absent from the list. If it still appears, select it and choose Remove from Account.
This final verification closes the loop: it confirms Find My is off, Activation Lock is cleared, and no future iCloud activity — such as a new owner’s backup — can be associated with the previous Apple ID. It also ensures the device count for iCloud storage and Apple subscriptions reflects the current device set accurately. For a related security scenario — what to do if a device goes missing before this process is complete — the guide on what to do if your iPhone is lost, stolen, or compromised covers remote lock and erase procedures in detail.
A Complete Handoff Is Worth the Time
The checklist above takes between 30 minutes and a few hours depending on the device and backup size, but it protects personal data, ensures the next owner receives a fully functional device, and preserves the trade-in value earned. Missing a single step — an active Activation Lock, a forgotten eSIM, an unverified backup — can create problems that are difficult or impossible to reverse after the device has left your hands.
For anyone setting up the replacement device that follows this handoff, the guide on whether a major macOS upgrade is worth installing now or later is a logical next step. Subscribe to We Are MacWise for practical Apple guidance delivered without the noise.
Frequently Asked Questions
Does erasing an iPhone automatically remove Activation Lock?
Only if the Apple ID is signed in on the device at the time of erasure. If the device was erased while signed out — or remotely wiped without sign-out — Activation Lock remains active and must be cleared manually from appleid.apple.com using the original Apple ID credentials.
Can the next owner use an eSIM if I don't delete mine first?
No. An eSIM profile tied to your carrier account will prevent the new owner from adding their own eSIM until the old profile is removed. Delete the eSIM under Settings → Cellular before erasing the device, or contact your carrier to release the profile remotely.
What is the difference between erasing an Apple silicon Mac and an Intel Mac?
Apple silicon Macs use a dedicated System Recovery environment accessed by holding the power button. Intel Macs use Command-R at startup to enter macOS Recovery. Apple silicon erasure also clears the Secure Enclave more cleanly; Intel Macs with a T2 chip require an additional step in Startup Security Utility to configure boot permissions for the next user.
Should I include the original box when trading in or selling?
Yes, where possible. Original packaging typically increases trade-in value and private-sale price, and it provides the safest shipping container for the device. Trade-in programs like Apple Trade In do not require the original box, but private buyers and resellers generally pay more when it is included.
How do I check battery health before selling an iPhone?
Go to Settings → Battery → Battery Health & Charging. The Maximum Capacity percentage is the figure most buyers and trade-in programs reference. A reading above 85% is generally considered good condition; below 80%, some programs will downgrade the trade-in tier.
What happens to my iMessage account after I erase the iPhone?
iMessage deregistration is separate from device erasure. If the phone number is being transferred to a new iPhone on the same Apple ID, iMessage continues without interruption. If the number is moving to a non-Apple device, deregister iMessage at Apple's official deregistration page (appleid.apple.com/deregister-imessage) before erasing, or messages sent to that number from other iPhones may not arrive.
Is it safe to sell a Mac without reinstalling macOS?
No. Erasing the drive without reinstalling macOS leaves the next owner without a bootable operating system. Always reinstall macOS from recovery after erasing, so the device starts up to the Setup Assistant — the expected clean state for a new user.
Independent guidance for making smarter, safer decisions across the Apple ecosystem.
