
Independent guidance for making smarter, safer decisions across the Apple ecosystem.
Roughly 30 percent of people have never backed up their computer, according to data cited repeatedly in data-loss research — and a significant share of those who do back up have never verified that their backup actually works. A backup you cannot restore is not a backup. It is a false sense of security. This guide covers how to build a Mac backup system you can actually restore: layered protection, the right hardware and services, testing procedures, and a schedule you will realistically follow.
Key Takeaways
- A reliable Mac backup system requires at least three layers: a local continuous backup, a local independent copy, and an offsite or cloud backup.
- Time Machine is a strong foundation but should never be your only backup.
- External SSDs offer faster restore speeds; external HDDs offer lower cost per terabyte for archival storage.
- Cloud backup services protect against physical disasters, theft, and ransomware — scenarios where local-only backups fail.
- Testing a restore is not optional. Schedule a restore drill at least twice a year.
- Retention policies matter: keep enough backup history to recover from a ransomware infection that may have sat dormant for weeks.
- A UPS (uninterruptible power supply) protects drives from power-surge corruption during a backup write.
- The best backup system is one you actually run consistently.
Why One Backup Is Never Enough
A single backup fails the moment the failure scenario affects both your Mac and that backup simultaneously. House fire, theft, a ransomware attack that encrypts everything on your network, or a power surge that kills both your iMac and the drive sitting next to it — these are not edge cases. They are the exact scenarios backup systems exist to address.
The answer is layered redundancy, sometimes called the 3-2-1 rule: three copies of your data, on two different media types, with one copy stored offsite. macOS gives you Time Machine as a starting point, but a complete system requires deliberate additions beyond it.
What Does a Three-Layer Mac Backup System Look Like?
The most practical layered approach for most Mac users combines three distinct backup types, each addressing a different failure mode.
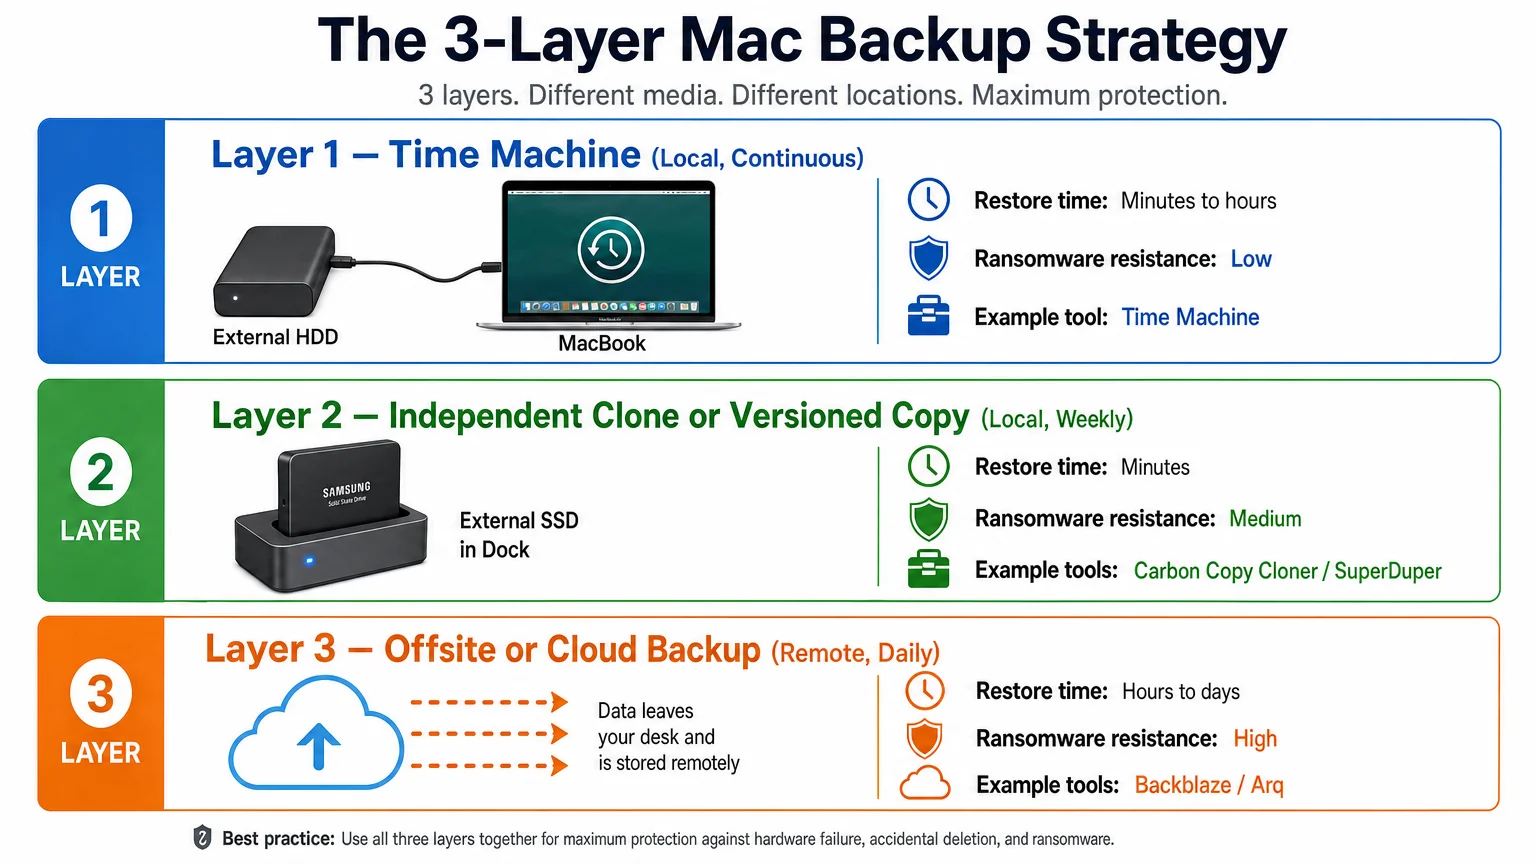
Layer 1 — Time Machine (local, continuous). Time Machine backs up hourly snapshots to a connected drive and keeps daily and weekly snapshots going back as far as the drive allows. It handles accidental deletions, corrupted files, and quick rollbacks with minimal friction. For most users, an external HDD in the 2–4 TB range provides months of hourly snapshot history. External SSDs are faster for restores but cost more per terabyte — worth it if restore speed is a priority or if you are backing up an SSD-based Mac and want consistent write performance.
Layer 2 — Independent clone or versioned copy (local, weekly). A bootable clone or a second versioned backup created by a separate application gives you a copy that is structurally independent from Time Machine. If Time Machine’s catalog becomes corrupted — which does happen — your clone is unaffected. Tools like Carbon Copy Cloner and SuperDuper have long track records on macOS for creating bootable clones and scheduled incremental copies. A dock with two drive bays lets you rotate drives and keep one offsite.
Layer 3 — Cloud or offsite backup (remote, continuous or daily). This layer protects against physical loss: fire, flood, theft, and ransomware that propagates across a local network. Cloud backup services like Backblaze Personal Backup continuously upload changed files in the background. Arq Backup lets you use your own cloud storage destination (Backblaze B2, Amazon S3, Wasabi, and others), which appeals to users who want control over where their data lives. Neither service is evaluated here with hands-on benchmarks, but both are widely used in the Mac community and have published documentation on their encryption and retention models — verify current pricing and features directly on their sites before subscribing.
Which External Drives and Docks Are Worth Considering?
External drives are the physical backbone of Layers 1 and 2. The right choice depends on budget, restore-speed priorities, and how you plan to rotate drives.
| Use Case | Drive Type | Notes |
|---|---|---|
| Time Machine (always connected) | External HDD 2–4 TB | Lower cost per TB, sufficient for continuous backup |
| Bootable clone | External SSD 1–2 TB | Faster boot and restore; portable |
| Offsite rotation | External HDD 2–4 TB | Cost-effective for archival; keep one at a second location |
| Multi-drive management | USB-C or Thunderbolt dock | Powers and connects multiple drives from one cable |
A Thunderbolt or USB-C dock simplifies cable management and lets you connect both a Time Machine drive and a clone drive simultaneously without occupying multiple ports. If your Mac has limited ports — common on MacBook Air models — a compact hub with bus-powered drive support is a practical solution. When selecting any drive, check that it is formatted for macOS (APFS or Mac OS Extended Journaled) before first use.
A UPS (uninterruptible power supply) deserves mention here. A power cut mid-backup write can corrupt a drive’s file system. Connecting your Mac and backup drives to a UPS prevents that scenario and gives you a clean shutdown window during an outage. Entry-level UPS units from established brands are available for under $100 and are a low-cost insurance policy for a backup setup that may represent hundreds of gigabytes of irreplaceable data.
How Do You Test Whether Your Backup Can Actually Restore?
Most backup guides stop at setup. This section does not, because an untested backup is an assumption, not a guarantee.
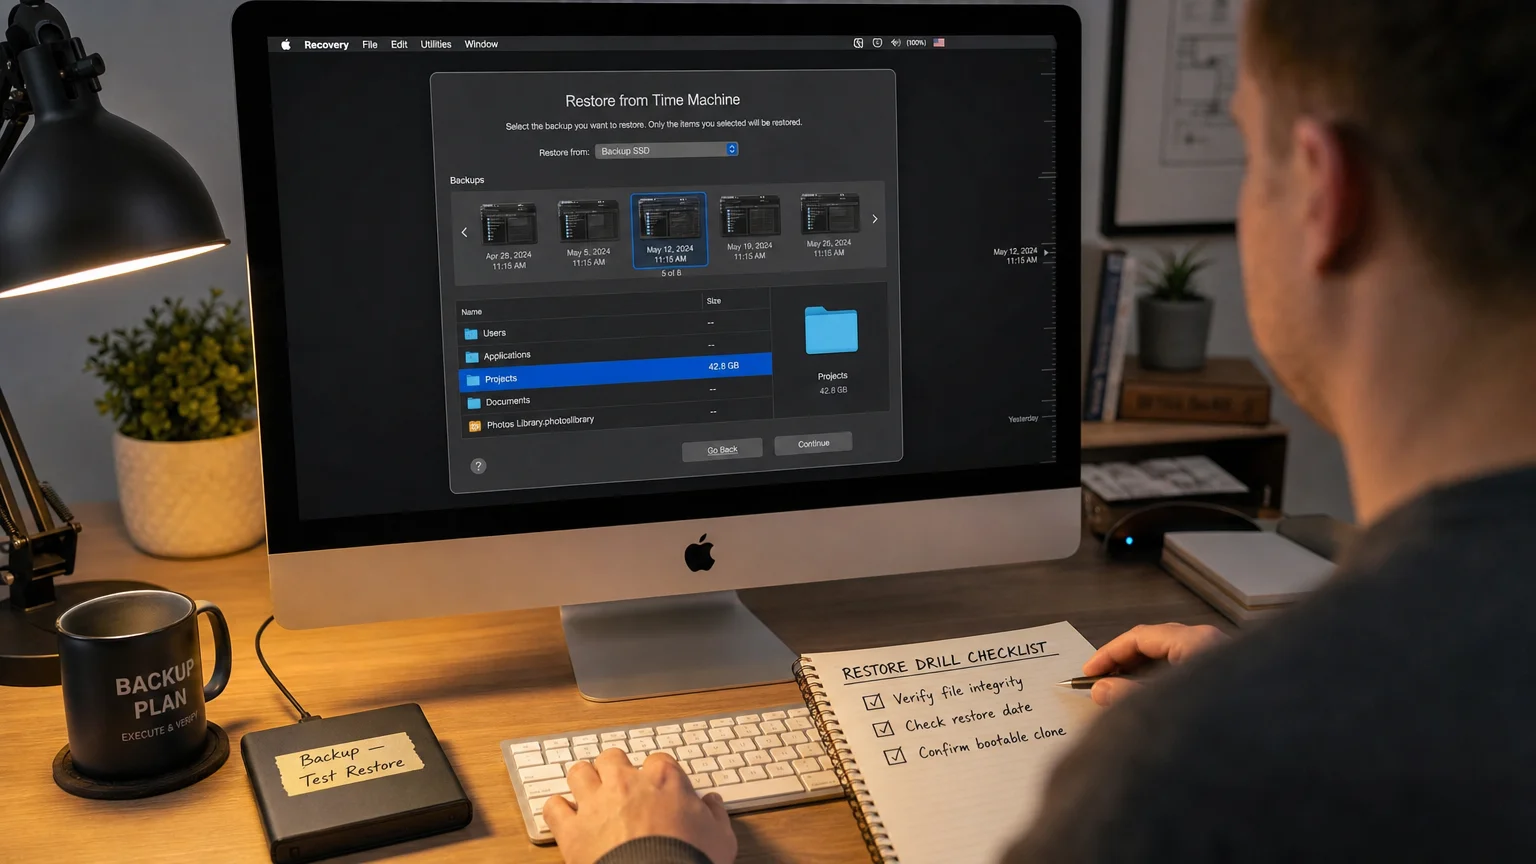
A restore drill does not require wiping your Mac. A practical drill involves three steps:
-
File-level restore test. In Time Machine, navigate back two weeks and restore a specific folder — a project directory, a photo album, a documents subfolder — to a new location on your desktop. Confirm the files open correctly and match what you expect.
-
Clone boot test. Restart your Mac while holding the Option key (or use Startup Security Utility on Apple Silicon Macs). Select your clone drive as the startup disk. Confirm the Mac boots, applications launch, and recent files are present. Restart back to your internal drive when done.
-
Cloud restore spot-check. Log into your cloud backup service’s web interface or app and download a specific file from a backup taken at least two weeks ago. Confirm it is intact and current to that date.
Run this drill at minimum twice a year — mark it in your calendar as a recurring event. After a major macOS upgrade is a natural trigger, since upgrades occasionally affect backup compatibility. If you are considering whether your current macOS version is stable enough to upgrade, Should You Install a Major macOS Upgrade Now — or Wait? covers that decision in detail.
How Does Ransomware Change Your Backup Strategy?
Ransomware targeting macOS is less common than on Windows but is not hypothetical — documented macOS ransomware variants exist, and the threat is growing alongside Mac’s enterprise adoption. The backup implications are specific.
Ransomware typically encrypts files silently over days or weeks before triggering. A backup system that only keeps 24–48 hours of history may contain nothing but encrypted files by the time you notice. This is why retention depth matters as much as backup frequency.
- Time Machine on a large enough drive keeps weeks of hourly snapshots, which provides meaningful ransomware recovery depth.
- Cloud backup services with versioning (Backblaze keeps 1-year history on its standard plan; verify current terms on their site) give you a recovery point before the infection began.
- A clone or independent copy that is disconnected from the network and powered off when not in use is immune to ransomware that spreads via network shares. This is the strongest argument for a physically rotated offsite drive.
Drive failure is a separate but equally important scenario. SSDs fail without warning; HDDs give audible or SMART-diagnostic signals but can fail suddenly too. No drive should be treated as permanent. Replace backup drives on a reasonable cycle — manufacturer-rated endurance specs and SMART monitoring tools like DriveDx can inform that decision.
For broader security hygiene on Apple devices, How to Set Up a Privacy-First iPhone in 2026 covers the mindset that applies equally to Mac security practices.
What Retention Policy Should You Set?
Retention is how long your backup system keeps historical versions of files. More history means more recovery options; it also means more storage.
A practical retention framework for most Mac users:
- Time Machine: Keep as much history as your drive allows. A 2 TB drive backing up a 500 GB Mac will typically hold several months of hourly snapshots before the oldest are pruned automatically.
- Clone/independent copy: Keep the two most recent clones if you rotate drives. Label drives with the date of the last clone.
- Cloud backup: Choose a service that offers at least 30 days of version history; 1 year is better for ransomware protection. Confirm the current policy before subscribing, as retention tiers vary by plan.
A Practical Backup Schedule You Will Actually Follow
Complexity kills consistency. This schedule is designed to be sustainable.
| Frequency | Action |
|---|---|
| Continuous (automatic) | Time Machine to connected external drive |
| Daily (automatic) | Cloud backup service running in background |
| Weekly (manual, ~10 minutes) | Run Carbon Copy Cloner or SuperDuper clone to second drive |
| Monthly (manual, ~5 minutes) | Rotate offsite drive; bring previous offsite drive home |
| Every 6 months | Run full restore drill (file, clone boot, cloud spot-check) |
| Annually | Review drive health with SMART tool; consider drive replacement cycle |
The monthly drive rotation is the step most people skip. A drive sitting in a desk drawer at a second location — a family member’s home, a workplace — is your protection against the physical-loss scenarios that local backups cannot address. If physical rotation is genuinely impractical, a cloud backup service with strong encryption and long retention is the functional substitute.
If you use iCloud for document sync, understand that iCloud is not a backup. It is a sync service. Deleting a file on one device deletes it everywhere. For a clear breakdown of what iCloud actually offers, iCloud+ and Apple One: Plans, Value, and Alternatives is worth reading alongside this guide.
Building a System Worth Trusting
A Mac backup system you can actually restore is not complicated, but it does require deliberate setup across three layers, a realistic schedule, and the discipline to test it. Time Machine handles the continuous layer automatically once configured. A weekly clone and a cloud service running in the background cover the remaining scenarios. The restore drill is what separates a real backup from a theoretical one.
For readers thinking about the broader security picture on their Apple devices, What to Do If Your iPhone Is Lost, Stolen, or Compromised covers the incident-response side of Apple security in similar depth. And if you are evaluating whether your current Mac hardware is up to the workload you are asking of it, Do You Actually Need a MacBook Pro? A Workload Test Before You Buy is a practical companion read.
Set up the system this week. Test it before the end of the month. The effort is measured in hours; the alternative is measured in what you cannot get back.
Frequently Asked Questions
Is Time Machine alone sufficient as a Mac backup?
Time Machine is an excellent first layer but is insufficient on its own. It does not protect against physical loss of the drive, ransomware that spreads across a local network, or simultaneous failure of your Mac and its connected backup drive. A complete system adds an independent local copy and an offsite or cloud backup.
What is the difference between a Time Machine backup and a bootable clone?
Time Machine keeps versioned snapshots you can browse and restore from, but it is not directly bootable as a startup disk in the same way a clone is. A bootable clone is a direct copy of your drive that you can start your Mac from immediately — useful when your internal drive fails and you need to keep working while waiting for a repair.
How often should I test my Mac backup?
At minimum twice a year. A practical approach is to test after each major macOS upgrade and once mid-year. The test should include a file-level restore from Time Machine, a boot from your clone drive, and a file download from your cloud backup service.
Can ransomware affect Time Machine backups?
Yes, if the Time Machine drive is mounted and accessible on the network, ransomware can potentially encrypt it. A drive that is physically disconnected when not in use is immune. Cloud backup services with versioning provide recovery points before an infection, provided the retention window is long enough.
Do I need a UPS for my backup drives?
A UPS is not strictly required, but it protects against file system corruption caused by power loss during a backup write. For a desktop Mac setup with always-connected backup drives, a UPS is a low-cost addition that meaningfully reduces one failure mode.
What cloud backup service should I use for Mac?
Backblaze Personal Backup and Arq Backup are frequently cited in the Mac community. Backblaze offers a flat-rate unlimited plan; Arq lets you use your own cloud storage destination. Verify current pricing, encryption standards, and retention policies directly on each service's website before subscribing, as these details change.
How large should my Time Machine drive be?
A common guideline is two to three times the size of the data you are backing up. For a Mac with 500 GB of data, a 1–2 TB drive provides reasonable snapshot depth. A larger drive extends how far back your hourly snapshots reach before older ones are pruned.
Is iCloud a backup for my Mac?
No. iCloud Drive, iCloud Photos, and related services are sync services, not backups. Deleting a file syncs that deletion to all devices. A dedicated backup system — Time Machine, a clone, and a cloud backup service — is separate from and complementary to iCloud.
Independent guidance for making smarter, safer decisions across the Apple ecosystem.
